Saturday, December 25, 2010

Merry Christmas! - French Baguettes and Spinach Stuffed Squash

I hope everyone is enjoying the Holidays.  It's been extremely busy for me, long hours at work, as well as multiple Christmas parties.  It's a pretty exhausting time.

I promised to post recipes from last weekend's Christmas party.  I'm not going to be able to post all of them, because I didn't cook all of the dishes (we had many contributors to the dinner), but I will post two- French baguettes and spinach stuffed squash.

Also, I received the half sphere molds for the yogurt charolettes for the French Laundry blueberry soup, so I will be posting that recipe in the very near future.  I will be taking off work the first week of January, and I plan to do quite a bit of cooking and writing during that time.

----

French Baguettes

4 cups white bread flour
1 1/2 teaspoon salt
1 1/2 teaspoon active dry yeast
1 1/3 cups warm water (100-110 degrees F)
Olive oil

Stir the flour and salt together in a large bowl, then add the yeast.  Make a well in the center and add the water.  Make sure the water is warm (100-110 degrees F), too hot or cold and it can kill the yeast.

Mix together the ingredients with a spoon until the dough starts to stick together, then knead the dough with your hands until it leaves the sides of the bowl and comes together.  To prevent dough from sticking to your hands too much, rub flour on them before touching the dough.

Turn the dough out onto a lightly floured work surface (clean counter or large cutting board) and knead it for several minutes until it is smooth.  Be careful not too work the dough too much.  The less you work it, the lighter it will be.

Cover the inside of a large bowl with a thin layer of oil, shape the dough into a ball, and place in the bowl.  Cover the bowl with a damp towel or plastic wrap, and place in a warm area for roughly an hour, until it is nearly doubled in size.  I like to warm my oven up to about 175 degrees F, then turn it off about a half hour prior.  This will keep it relatively warm, and is a good place to keep the dough so it can rise. 

After an hour or so, turn the dough out onto your cleaned, lightly floured work surface again, and knead it briefly.  Cut it in half and shape the pieces into two balls.  With your hands, work each piece into a rough rectangle measuring 7-8 inches long by 2-3 inches wide.  Roll each piece lengthwise, folding it roughly 3 times into it starts to take the shape of a baguette.  Place the dough on a cookie sheet, cover with a damp cloth of plastic wrap, and place in a warm place to rise for 10-15 minutes.  You will need to do this twice more, each time repeating the folding and rising.

The final time you fold the dough, stretch it to approximately 12-14 inches in length., and fold it into the shape of a baguette  Cut deep slits in the top of the loaf.  Let the dough sit for another half hour in a warm place.

Heat the oven to 450 degrees F.  Place the loaves in the oven, as well as another cookie sheet with water in it on the rack below the loaves.  The water will help keep the crust of the bread from becoming too crispy.  Bake for 15-18 minutes.  Remove from oven, cool on wire racks, and brush with olive oil.


I like to keep the loaves in tin foil when not serving them.

----

Spinach Stuffed Squash

4 large yellow squash
1 1/2  teaspoon salt
1/4 cup butter
1/2 cup grated fresh Parmesan cheese
1/4 teaspoon pepper
1 small onion, chopped
2 (10 oz) package frozen chopped spinach, cooked and well drained
1 cup sour cream
2 teaspoon red wine vinegar
1/4 cup fine, dry bread crumbs
1 tablespoon cold butter, cut up

Combine squash, 1/2 teaspoon salt and water to cover in a large pot.  Bring to a boil and cook until tender, 10-20 minutes.  Remove the squash from the water and allow them to cool.

Cut the squash in half lengthwise and remove the seeds. Drizzle the cut sides of squash with 2 tablespoons melted butter.  Sprinkle with 2 tablespoon Parmesan, 1/2 teaspoon salt and pepper.

Pour remaining 2 teaspoon melted butter in a large skillet over medium high heat and add onions.  Sauté the onions until tender, roughly 4-5 minutes.

Stir in cooked spinach, sour cream, red wine vinegar and remaining 1/2 teaspoon salt.

Spoon spinach mixture evenly into squash halves. Place squash in a 13” x 9” baking dish. Sprinkle with bread crumbs and remaining 6 tablespoons cheese and cold butter. 

Bake 350 degrees F for 15 minutes or until thoroughly heated.

Sorry, I don't have pictures of the stuffed squash.  But try out the recipe, I'm sure you'll like the results.

----

Also, I'm very happy to have received several awesome food related Christmas presents:  A food grinder attachment for my Kitchenaid mixer, a cast iron dutch oven, The Flavor Bible and Culinary Artistry, both by Andrew Dornenburg and Karen Page, and a massive, Wusthof 10" chef's knife with an extra wide blade.  I can't tell you how awesome this knife is.  It cuts through anything like butter, and is HEAVY.


Here it is next to a regular 8" chef's knife for comparison.


----

Well that's it for today.  Happy Holidays and Merry Christmas everyone!

Tuesday, December 14, 2010

Slight delay..

There's been a delay in posting Cream of Blueberry Soup with Charlottes.  I ordered gelatin sheets and half sphere molds weekend before last and just now received the gelatin sheets.  I still have yet to receive the molds, and the tracking number for the shipment is not working.  I know everyone is just quivering in anticipation, but until I get the molds, there's nothing I can do about it.

However, this weekend I will be hosting a Christmas dinner/party, and the menu will feature a lot of different dishes and desserts.  After the party I will be posting those, along with several other recipes from the menu.  Maybe I'll even include pictures from the party.  So stay tuned, there will be a lot coming this weekend.

Sunday, December 5, 2010

Roast Chicken on a Bed of Vegetables and Homemade Mac and Cheese

You might have noticed things look a little different here than they did during my last post.  I'm working on a little redesign to make it look a bit neater and cleaner around here.  Also, kudos to my roommate Michael for designing me a new logo.

Well, the Cream of Blueberry Soup is on hold at the moment.  I'm going to try to get it done this week, but I am having a little difficulty finding gelatin sheets and the hemisphere molds needed for the yogurt charlottes.  I will probably have to end up ordering the items online.

So rather than post nothing at all this weekend, I'm posting a recipe from dinner last night.  Michael and his girlfriend Laura joined me for a meal that included roast chicken on a bed of vegetables and some homemade macaroni and cheese (it was Michael's reward for the new logo).  You might remember my first post, which was roasted chicken.  Well, this takes roast chicken and turns it up a notch.  This recipe is based upon the recipe Roast Chicken with Root Vegetables from Ad Hoc.


I neglected to take pictures of the process, but luckily Michael was able to snap of couple shots of the finished product.

----

Roast Chicken on a Bed of Vegetables

3.5 lb chicken
1 1/2 cup carrots
2.5 lbs red potatoes
2 leeks (white and light green parts only)
Half of a white or yellow onion
Thyme
4-5 cloves garlic
Sea salt and freshly ground pepper
4 tablespoons butter
Extra virgin olive oil

Preheat the oven to 475 degrees F.

Peel and chop up the carrots, and cut the potatoes into chunks.  Chopped the root end off the leeks, and cut off the long dark green ends as well.  Chop the leeks and place them in a strainer, and rinse them.  Leeks can often contain dirt within their many layers, so I find it is best to wash them after you chop them, as it is easier to remove the dirt.  Cut the onion in whatever way you choose (I prefer larger chunks, but if you prefer smaller ones, that will work fine with this dish).  Put all of the vegetables in a bowl, and toss with olive oil and salt and pepper, and then spread them out on a skillet.  I used a large cast iron skillet for this recipe, but you can also use a baking dish, it just needs to be deep enough to keep the juices from the chicken in so the vegetables can roast in the juice. 

 Clean the chicken- remove the giblets, rinse it, and pat it dry with paper towels.  Also, make sure the chicken is up to room temperature.  Guess what happens when you add several pounds of cold meat to a hot oven?  The temperature goes down drastically.  So let it sit to at least room temperature before you put it in.

A quick note- if you rinse the chicken off in the sink, be sure you go back and sterilize the sink and surface around it afterward.  You definitely don't want your kitchen to be harboring germs from the raw chicken.

I removed the wishbone from the chicken using a paring knife prior to doing anything else to it.  You don't have to, but it makes it easier to carve once it is done. 

Salt and pepper the cavity of the bird, add the garlic cloves, and several sprigs of thyme, using your hand to try to spread the spices and herbs around inside of it.  Truss the chicken.  Salt and pepper the outside of the chicken, and cover it with a light layer of olive olive.  Chop up several springs of thyme and sprinkle it across the top of the chicken.

Make a bed within the vegetables in the pan to place the chicken in.  Top the chicken with several pats of butter (healthy, I know), and place it in the oven for 20 minutes.  If you use a bird over 4 lbs, you might want to leave it at that temperature for 25 minutes.

After the 20 minutes, reduce the temperature to 400 degrees F (yes, you leave the chicken in the oven while the temperature is reducing).  Cook the chicken at that temperature for around 45 minutes, or until the temperature in the thickest parts of the chicken register at 165 degrees, or the juices run clear if you poke the thighs with a knife.

Remove the chicken and vegetables and let them rest for 10-15 minutes before carving.


----

Homemade Macaroni and Cheese

1 lb (16 oz) sharp cheddar (grated)
1/4 lb Monterrey Jack (grated)
2 cups half and half
4 tablespoons butter
Sea salt
1 1/2 lb elbow macaroni pasta

Boil the macaroni in salted water until it is the desired texture, and drain the water.

Using a saucepan over medium-low heat, add the half and half and butter.  Allow the butter to melt, add the salt, and then add the cheese, a bit at a time, slowly stirring the entire time so that no cheese sticks to the pan.  Once all the cheese has been melted and combined, pour the cheese mixture over the macaroni and stir to divide it evenly, and serve.

----

I'm doing my best to get the items needed for the Cream of Blueberry Soup with Yogurt Charlottes.  Hopefully I will have that recipe up later this coming week.

In the mean time, you can follow me using your Google account (press the follow button on the right side of the page).  Alternatively, feel free to share any of my posts on Facebook or Twitter.

Monday, November 29, 2010

Up next....

So the Thanksgiving week was pretty busy for me and I was unable to document anything I cooked to post on here.  But don't fret, I'm preparing for the next French Laundry dish, and this one should be a good one.  I thought about doing one of the meat dishes, but being that holidays are closing in and this is the one time during the year when I really get a sweet tooth, why not do a dessert?  I don't see a problem with that, and I hope that no one reading this does either.  And if you do, well....I don't really care.

And the next recipe will be...drum roll please.....Cream of Blueberry Soup with Yogurt Charlotte.  Why?  Well, because I love blueberries, that's why.  Now I need to find some gelatin sheets and we'll be on our way...

Friday, November 19, 2010

Quick Shoutout

I just wanted to post a quick shoutout and thanks to my friend Amanda for mentioning Sel Gris in her "Thursday 13" blog list over at thelivingroom.wordpress.com.  Go check out her blog.  And Amanda, you mentioned in your "Things to do before I go" section that you want to make brioche....I'll do a brioche special eventually and hopefully you'll be inspired to try to make some soon.

Wednesday, November 17, 2010

Clams Merinieres with Soffritto

Alright, it's been several days since my last post, but here it is, Clams Merinieres with Soffritto.  Total time to cook the clams tonight: about 3 minutes.  Total prep time for the supporting ingredients: 6 hours.

Yes, it took 6 hours of time to prepare the soffritto and garlic confit for the dish.  I actually made the  garlic confit last Friday, and the soffritto on Saturday.  Both keep for a week in the fridge, so I was alright waiting until today to make the dish.

----

Garlic Confit is a prominent supporting ingredient in Bouchon, and is used in a number of dishes.  It involves combining peeled garlic cloves with canola oil, and slowing cooking it over low heat with a diffuser until the garlic becomes almost as soft as butter.


In the book it says it should take around 40 minutes for the garlic to get soft enough, but it took closer to an hour.

The following day, I made the soffritto.  It involves caramelizing onions in olive oil over about 2 1/2 hours on low heat on a diffuser.


After about 2 1/2 hours, you puree some plumb tomatoes on a box grater, and add the puree to the mix.


That all cooks for another 2 1/2 hours until bubbles coat the entire surface.  Both the garlic confit and the soffritto can be store in oil for a week in the fridge.

----

On to the clams.  The recipe calls for Manila clams, however, everywhere I went to today was out of Manilas.  The fishmonger at Central Market said he could get me some by next Monday, but that would have been too long, so he suggested I use littleneck clams instead, as they would be closest to Manila.

The actual prep time for the clams pales in comparison to the prep time for the soffritto.  Basically you chop up some shallots, thyme, parsley, and have your confit, soffritto, some white wine, and butter ready to go, because you are going to be doing things quick.


First, you rinse the clams under cold water, and if they are dirty, clean the with a scrubber.


Next, you heat your pot up, add some olive oil and the shallots.  The shallots need to be cooked for about a minute, then you add the soffritto, confit, thyme, and salt and pepper.  By this time your kitchen should smell pretty awesome.  Once the combination of ingredients cooks for a bit, the aroma really fills the room and gets you ready for the mollusk-y goodness to come.

Next, you add butter and the clams.


Cook the clams for about 30 second uncovered, then add the white wine, cover, and steam until the clams open.  Once they open you will know they are done.


There should have been chopped parsley in the bowl as well, but I forgot that until about half-way through.  The recipe also calls for a "crouton" (sliced and toasted bread) with either aoli or olive tapenade, however I didn't have time to make either of those, so it had to be just the clams tonight.

And the tasting verdict?

I thought they were very good.  I pretty much inhaled them as soon as I could pry each clam out of its shell.  They had a nice briny taste that I enjoyed, with other complex tastes from the garlic, soffritto, herbs, and wine.  My roommate, Mitchell, didn't share my enthusiasm.  However, at his defense, he isn't fond of seafood, but I am proud of him for trying it.

So there it is, Clams Merinieres with Soffritto.  If you like clams, or seafood in general, you will probably enjoy it.

Wednesday, November 10, 2010

Bolognese Ragu

I love bolognese sauce.  It's so rich and flavorful, and the longer you cook it, the better it gets.

This recipe is the bolognese sauce I cook often, and it has always brought a smile to the faces of those who eat it.  It is very rich, and extremely hearty.  It's perfect for when the weather starts changing and it starts getting colder, just like this time of year.

What am I talking about?  It's good all year long.  I made this stuff multiple times during the summer to much fanfare.  So try it, it's really not too difficult, you just have to be patient, and let it cook until the liquid has reduced.  Once it gets going, don't be tempted to think that it is done.  You'll know it's done when the liquid has cooked out and what's left is a wonderful, meaty sauce.

This recipe is adapted from the Lamb Ragu recipe from Andrew Carmellini's Urban Italian cookbook, which is a fantastic book, and highly recommended if you are looking for a good Italian cookbook.

I make it a little different than Carmellini.  I use 3 different types of meat, more tomatoes, and slighty different amounts of herbs and spices than he does, but the results are excellent.  I find that using a combination of lamb, Italian sausage or ground pork, and either pancetta or prosciutto add a nice extra dimension to the taste.


---

Bolognese Ragu


1 lb. ground lamb
1 lb. ground Italian sausage or pork
2-4 oz pancetta or prosciutto
1/2 cup chopped onion
1/2 cup chopped carrot
1/2 cup chopped celery
1 1/2 tablespoon tomato paste
1 28 oz can peeled organic tomatoes (I used a brand called Cento)
3 cups chicken broth
1 1/2 to 2 cups red wine
2 bay leaves
1/2 teaspoon red pepper flakes
1/2 teaspoon coriander
1/2 teaspoon fennel
3/4 teaspoon cumin
1 1/2 tablespoon thyme
1 1/2 tablespoon rosemary
1 teaspoon salt
Black pepper to taste


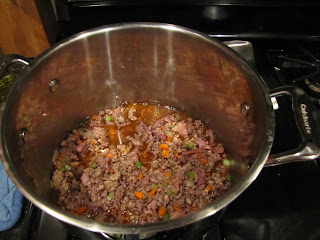
First, you brown your meat.  Put some olive oil in your pot over medium-high heat and crumble the meat into the pot.  Let it cook for a couple minutes, and give it a couple stirs so that it gets brown on all sides.

Next, add in the onions, carrots, and celery, and cook it until it becomes soft, which can take several minutes.


After the vegetables become soft, add the tomato paste and stir it until it is mixed in with the meat and vegetables, and then add the wine.  The wine is a key part to this sauce, and you want to reduce it down and let the meat and vegetables absorb that flavor.  The wine should reduce down within several minutes if you have the pot hot enough.


After the wine reduces down, add the tomatoes, chicken broth, and all the herbs and spices to the mixture.  This is the part where you have to be patient.  Turn up the heat until you have the sauce at a low boil, and then reduce it until the sauce is simmering (medium-low heat).  And wait....and wait...and wait.


You'll know it's done when the liquid reduces and you are left with a thick, brown, meaty sauce that smells absolutely wonderful.  But this will take a long time, probably much longer than you are used to waiting.  Usually it takes about 2-3 hours for the sauce to reduce down.  This is a good thing.  All that time simmering allows the flavors to meld.  In the mean time, scrape down the sides and bottom of the pot every once in a while to make sure that nothing is sticking to the pot and burning.  You will need to do this often, as you don't want any burnt flavors in the sauce.  It is also a good idea to skim any fats floating on the surface of the sauce as well.


When the sauce starts looking like it will soon be done, cook your pasta.  After the pasta is cooked, drain it and put it in the pot with the sauce.  Add some olive oil and butter, and stir the mixture to combine the pasta and sauce.


Serve the pasta topped with pecorino cheese (parmesan would probably work as well if you can't find pecorino, but get real parmesan and grate it yourself, don't get that powdered crap in the green can).


So there you have it.  If you are not a fan of lamb, you can use ground beef if you choose, although I think the lamb is one of the keys to the flavor in this dish.

Next up, back to the Keller recipes, Clams Marinieres with Soffritto from Bouchon.

Monday, November 8, 2010

Coming up...

I haven't updated the blog in a couple days, so I don't want everyone to think I had forgotten about it.  I know I had planned to do the Red Mullet dish next, but due to lack of red mullet in the area, I'm going to switch to another dish and try the red mullet later.

Coming up this week will be two posts: Clams Marineres with Soffritto from Bouchon, and my own recipe for Bolognese sauce (which, I have to brag, is pretty freaking awesome).  I will likely do the Bolognese sauce first, and then the clams later this week, so stay tuned.


Wednesday, November 3, 2010

Gazpacho (Part 2) and Balsamic Glaze

I thought about maybe naming this post Gazpacho Returns, or Gazpacho Strikes Back.  Maybe even Gazpacho II: The Return.  Anyway, needless to say, the gazpacho turned out wonderful, and the balsamic glaze really kicked it up a notch.  There's wasn't much for me to do today (besides waiting around for over two hours for the glaze to reduce), so there won't be a ton of pictures and this post won't be very long.

----

When I got home from work I started on the balsamic vinegar glaze.


The balsamic vinegar goes in a pan, which is then placed on a heat diffuser on about medium heat and reduced until it becomes almost syrupy.


Once it is done (in this case, about two and a half hours), you pour it into a squeeze bottle and it is ready to go after it cools a bit.


It doesn't make very much, but that's OK, because it's pretty potent, and you don't want to use very much at a time.

Then the gazpacho from yesterday's post, which has been sitting in the fridge all day, is blended, served in a bowl, and topped with a little of the glaze.


I tried to make some type of cool looking design, but ultimately failed in my food decorating skills.  But hey, the flavor was fantastic.  Michael and his girlfriend, Laura were around and they each loved it as well.  The gazpacho, combined with the glaze, provide a pretty bold flavor.

So that's it for this post.  I'm also going to be working to try to get a better design up for the blog.  I know the current one is pretty "blah".

Gazpacho (Part 1) and Gnocchi

So I pretty much spent the majority of tonight in the kitchen.  Actually, up until this point, I have sent the ENTIRE night in the kitchen.  Not that I'm complaining, though.  It was just a long night.  First off, I made the grilled cheese sandwiches out of Ad Hoc (and once again, neglected to take pictures....rest assured, it's neither difficult, nor something you probably haven't seen before).

The grilled cheese from Ad Hoc have been proclaimed around our house several times as being the greatest grilled cheese ever.  I don't know if I would necessarily say ever, being that I haven't tried that many different types of grilled cheese.  But they are definitely good.  Unlike the recipe, I make them on sourdough bread, as everyone enjoys them and I think it fits well with the gruyere cheese the recipe calls for.

Here's the entire process:  put gruyere cheese in between bread (I also cut the bread in half), heat butter in a skillet, place bread with cheese in the skillet till it browns on the bottom, flip it, brown the other side, take it out of the skillet and put a little melted butter on both sides (so incredibly healthy), and put in the oven at 350 degrees till the cheese melts.  That's it.  Do this, and everyone will proclaim you to have made the greatest grilled cheese in the history of mankind. 

----

On to the gazpacho.  There's nothing difficult at all about The French Laundry's gazpacho recipe.  It involves cutting up onions, bell pepper, cucumber, tomatoes, and garlic, and putting it, along with tomato juice, tomato paste, olive oil, salt, white vinegar, thyme, salt, lemon juice, and cayenne in a bowl, and putting it in the fridge overnight.  And since I'm sure you all like pictures, here's the ingredients:


I made it slightly more labor intensive for myself because the grocery store only had tomato juice from concentrate.  I'm not a fan of using things from concentrate, so I proceeded to make my own tomato juice by blending some tomatoes and straining them through my chinois to make the juice.  Yeah, I know I could have done it the easy way and just bought some, but where's the fun in that? 

The gazpacho will sit overnight in the fridge, and tomorrow I will conclude the gazpacho with Part 2, which will also involve making the balsamic glaze the book calls for to complement it.

----

Gnocchi.  Gnocchi, gnocchi, gnocchi.

It's pretty fun to say, isn't it?

Well..it's pretty freaking time consuming to make when you've never made it before.  Especially when the recipe ends up yielding 20 dozen of them.  Yes, that's 240 total.  I got so tired of rolling and boiling those suckers that I gave up around 200 and still have a ball of gnocchi dough in my freezer that I can use to make some more later.  It's my fault though, I shouldn't have started making them so late.

So on to the whole process.

You start with these:


Bake them in the oven like you would when you want to make baked potatoes.  Get them all nice and soft on the inside.  Then, when they're done baking, take them out and scoop out the inside, like so:


That wonderful white and green contraption in the background is my new potato ricer I bought specifically to use for this recipe.  And this is how it works:  Potatoes go in, you squeeze the handles together, and potatoes come out looking like this:


After that, you make a well in the center of your newly riced potatoes, add some flour, several egg yolks, some more flour, and salt.


Then you mix it all together really fast with a dough scraper.  And when I say fast, I mean...FAST.  In all capitals, that way you know I mean business.  Actually, Keller says it should take no more than 15-30 seconds, and you don't want to overwork it any more than that.  Well, you can picture me frantically chopping away at this mixture with a dough scraper, trying to get it all mixed within a matter of seconds.  It wasn't pretty....potato, flour, and egg ended up all over.  Ok, so it wasn't that bad, but I did have quite a few bits go flying.

After getting it all mixed up, you roll it into a ball, break off a piece, and roll it out into a "snake" (Keller's wording, not mine).


The picture's kind of blurry, but you get the idea.  That's what happens when you try to take a picture with dough-covered hands.  Next, you cut the dough into smaller pieces.
Then, roll each piece into a ball, and use the back of a fork (or gnocchi spoon, which I didn't have) to roll the pieces into the traditional gnocchi shape, with grooves and everything.


So my gnocchi rolling skills need improvement.  At least Ive got more dough in the freezer to practice with.  The gnocchi then go into boiling water, and boil until they float.  Once they float, they are plunged into ice water to cool for a couple minutes, then drained on paper towels, and placed on parchment paper on a tray or cookie sheet, and frozen.  Once they are completely frozen, they will be put into smaller plastic bags, and available to use anytime I feel like.  Which might be tomorrow....we'll see.


So there's the gnocchi.  Next up with be Gazpacho Part 2, including the balsamic glaze.

Thursday, October 28, 2010

Mushroom Stock and Chicken Curry

Alright so I know I've been promising to post the mushroom stock.  Well, the good news...I made it tonight...the bad news...I forgot to take pictures.  I know.  I'm a horrible person, and I made a mistake.  But you see, tonight I was also put in charge of making Indian food for 10 people, and that made me forget about the process of documenting everything.  I ended up making a chicken curry with rice, pretty basic but it fed everyone, and they seemed to enjoy it.  I would have liked to have gone a little more elaborate with it - I was hoping to do something with lamb, and maybe make some naan bread - but with work and an expectantly busy week, it just didn't happen.  So we made due with chicken curry (recipe follows).

Keep note this is for 10-12 people.  You would probably want to half it.
  • 4 pounds skinless, boneless chicken breast halves
  • 1 tablespoon and 1 teaspoon salt
  • 1 cup cooking oil
  • 3 cups chopped onion
  • 2 tablespoons minced garlic
  • 1 tablespoon minced fresh ginger root
  • 2 tablespoons curry powder
  • 2 teaspoons ground cumin
  • 2 teaspoons ground turmeric
  • 2 teaspoons ground coriander
  • 2 teaspoons cayenne pepper
  • 2 tablespoons water
  • 2 (15 ounce) cans crushed tomatoes
  • 2 cups plain yogurt
  • 2 tablespoons chopped fresh cilantro
  • 2 teaspoons salt
  • 1 cup water
  • 2 teaspoons garam masala
  • 2 tablespoons chopped fresh cilantro
  • 2 tablespoons fresh lemon juice
  1. Sprinkle the chicken breasts with salt. 
  2. Heat the oil in a large skillet over high heat; partially cook the chicken in the hot oil in batches until completely browned. Transfer the browned chicken breasts to a plate and set aside.
  3. Reduce the heat under the skillet to medium-high; add the onion, garlic, and ginger to the oil remaining in the skillet and cook and stir until the onion turns translucent, about 8 minutes. Stir the curry powder, cumin, turmeric, coriander, cayenne, and 2 tablespoons of water into the onion mixture; allow to heat together for about 1 minute while stirring. Mix the tomatoes, yogurt, 2 tablespoons chopped cilantro, and 2 teaspoons salt into the mixture. Return the chicken breast to the skillet along with any juices on the plate. Pour 1 cup water into the mixture; bring to a boil, turning the chicken to coat with the sauce. Sprinkle the garam masala and 2 tablespoons cilantro over the chicken.
  4. Cover the skillet and simmer until the chicken breasts are no longer pink in the center and the juices run clear, about 20 minutes. An instant-read thermometer inserted into the center should read at least 165 degrees F (74 degrees C). Sprinkle with lemon juice to serve.
 (Recipe found here.)

Everyone seemed to enjoy it, so I guess I can't complain.  My roommate Mitchell managed to snap a few shots as I was cooking it.


That was alot of chicken.

------

So on to the mushroom stock.  The recipe calls for 1lb of mushrooms (any type), carrots, leeks, onions, parsley, and thyme.  It is made very similarly to the vegetable stock.  All the vegetables are cut up, put in a food processor, then to a stock pot where they are softened with a little oil.  Then simmered in water for about 45 minutes.

What's different about this stock is that after the first simmer, the solids are drained as before, and the stock is set aside.  Then the solids are returned to the pot and simmered again in new water.  After that is strained, both of the stocks are combined, boiled, and reduced down to only 3 cups.  It seems like alot of work for so little, but hopefully it will be worth it.

So sorry about the lack of details and pictures in this post.  I'll try to do better in the future.  And if you need a new meal to try, cook the curry recipe, it is pretty good.

Coming up soon...gnocchi!

Tuesday, October 26, 2010

Vegetable Stock and a Quick Dinner

Many of the recipes within The French Laundry, Bouchon, and Ad Hoc all feature several different types of stocks: vegetable stock, mushroom stock, chicken stock, veal stock, etc.  Most of these stocks take quite a while to make, so it's a good idea to make quite a bit and store it.  Stock keeps for a long time in the freezer.

Tonight I started off with vegetable stock, and tomorrow I will be making the mushroom stock.  The veal stock will hopefully follow, assuming I can find 10 lbs. of veal bones and buy a 16 quart stock pot (I used an 8 quart for the vegetable stock).

So before I started on the vegetable stock, I made a quick dinner.  I hate cooking on an empty stomach, and usually am eating on something whenever I am in the process of working on a big meal or time consuming dish.  I find I make less errors by rushing to get things done if I already have food in my stomach.

I made a quick pasta with mushrooms and herbs, nothing too elaborate.

I started with mushrooms, onions, thyme, and parsley.


I sauteed the onions and mushrooms for a little while in butter, then added some red wine and reduced that for a bit with the herbs, and came out pretty good.  This is a simple, easy meal that takes no more than 15-20 minutes to prepare.


Not too crazy or anything, just a simple meal.

On to the stock.  Keller uses leeks, fennel bulb, onions, carrots, thyme, parsley, and bay leaves in his vegetable stock recipe.


First you coarsely chop up the vegetables.  The cuts on these don't have to be precise because they are going into a food processor in a minute.


I do like to have bowls handy for my ingredients when I can.  It just makes things alot easier.

After chopping them up in a food processor, they go into the stock pot with a little oil to soften them up.


After they are softened, the herbs and bay leaves are added, along with several quarts of water.


This is brought to a simmer, and then simmered for about 45 minutes. When you are working with this much liquid, it can take a while to bring it up to a simmer.  Don't lose patience.  It took me about a half hour to get it to a simmer.

Afterwards, the stock is strained through a chinois strainer (not to be confused with a China cap strainer, which is conical shaped), and frozen.


This recipe yielded about 3 quarts of stock, after the loss of liquid due to evaporation and skimming.


And speaking of skimming, it's always a good idea to skim stocks.  Keller is pretty adamant about it, and says to skim often.  And this is why:

That's about 2 cups work of nastiness I skimmed off the top.  It's nearly opaque.  And keep in mind, that's all from vegetables.  I can't wait to see the fun stuff I'll get to skim off the veal stock.

So that's it for today.  Coming up next....mushroom stock, and beyond...

Sunday, October 24, 2010

A question for anyone reading this..

Due to the nature of the recipes contained within The French Laundry and Bouchon, I will most likely be limited to one per week, at least until I can get most of the stocks and supporting recipes done.  Therefore, if anyone is interested, I can start posting during the week with other recipes, some out of different cookbooks, and some of my own.  I can try to be detailed with the process of cooking these so that others can learn the techniques and try new recipes.


Feel free to comment and let me know what you think, as I would love to have feedback regarding this.


--

Look for my next post either later today or tomorrow, in which I will make the vegetable and mushroom stocks from The French Laundry.  Later this week I will do the gnocchi recipe, and following that, possibly early next week, will be the first full dish out of the French Laundry, Red Mullet with a Pallete d'Ail Doux and Garlic Chips.  I might also fit in the blueberry cobbler recipe from Ad Hoc sometime in between.

Sunday, October 17, 2010

It begins...Simple Roast Chicken

I love food.  Not just eating it, but the process of turning raw ingredients into something that can be enjoyed.  It's a sense of accomplishment to create something that can be enjoyed not only by yourself, but by others.  It's just an added bonus that it can taste great as well.

I've been cooking since I was rather young.  I still remember the first thing I cooked (with my mom's help) when I was roughly 5-6 years old.  I made "Mexican pizzas" out of Mexican cookbook my mom had (they were actually tostadas).  I remember at that time being so happy to be able to serve the rest of the family those tostadas.

Since then I have been in and out of the kitchen over the years, sometimes going through periods where I spent alot of time trying out new recipes and working to develop my own, and others just sitting back and consuming rather than creating, which seemed to be most of my high school years.

Once in college, without my mom around to prepare meals for me, I ended up back in the kitchen.  I became tired of the cafeteria food that was served on campus, and in the interest of both saving money by not eating out, and being able eat food that had some semblance to the meals I was used to eating back home, I took to the kitchen once more.  The food I created during that time was whatever I could cook in my spare time that reminded me of home, while also delving into more ethnic cuisines.

Since that time, I have really grown to love the whole process of cooking, and to appreciate the ingredients that go into a quality meal.  This is what led me to The French Laundry and Bouchon cookbooks.  Both books are based upon restaurants owned by Thomas Keller, who has become one of the top chefs in America.  His restaurants are constantly winning awards, and The French Laundry has been ranked #1 in the world for several years.

My goal is to bring my cooking skills up to a new level by attempting to cook my way through both of these books, while at the same time, using the techniques taught within them in my own recipes.  I expect some of these recipes to be pretty difficult, so I might have to try them a few times to get them right.  I hope that by following me through this that you will be inspired to try new recipes and bring your own cooking up to the next level.  Don't be afraid to try something new.  It's just food.

Also, for those who might be wondering.... sel gris is French gray salt, which Keller uses in quite a few recipes.  I thought it might be a decent name for the blog.


------

Simple Roast Chicken

I'm starting off by cooking the very first recipe in Bouchon, entitled "My Favorite Simple Roast Chicken".  Keller is a big fan of roast chicken, and has a number of roast chicken recipes in his books.

The recipe calls for a 2-3 pound chicken, which I had a hard time locating in the grocery stores around here.  Luckily, I was able to get a 2.84 pound bird from a butcher, which is what I will be using in this recipe.

The simple roast chicken is exactly that...very, very simple.  The chicken is rinsed, dried, seasoned with kosher salt and black pepper, trussed, and roasted in the oven for just under an hour.  Afterwards, it is basted in its own juices and some fresh thyme, which I luckily had quite a bit of.

Here's the bird before going in the oven.  Please ignore the trussing, my trussing skills aren't really up to par.  Not that it's difficult to begin with, I just don't do it enough.


The bird had a bit of a lean to it that I didn't notice when I bought it, so it looks a little weird when trussed.

And here it is fresh out of the oven after I added thyme to the juices and then basted it and let it sit.


And here being enjoyed by Mike, my roommate/taste tester. 


Notice there's not much meat left on there.  It was very good, and cooked up nice, juicy and tender.

I also want to note: total cost for this recipe, not including the fresh thyme I had in my fridge: $3.75.  Just shows that you CAN eat well, and cheap.

So that's it for my first post.  If you have any comments/suggestions, feel free to let me know.

One recipe down...many more to go.  Stay tuned.